MPCNC Primo: The Mostly Printed CNC Router That Started a Movement
There's a weird moment in hobby CNC where you realize that the $2,000 machine you've been eyeing has a frame made of aluminum extrusion and V-wheels, is controlled by a board that runs open firmware, and could theoretically be replicated for $400 in parts from AliExpress and a weekend of assembly. R
Table of Contents
Published in: Open-Source Builds | ~14 min read
There's a weird moment in hobby CNC where you realize that the $2,000 machine you've been eyeing has a frame made of aluminum extrusion and V-wheels, is controlled by a board that runs open firmware, and could theoretically be replicated for $400 in parts from AliExpress and a weekend of assembly. Ryan Zellars had that realization about a decade ago, and the result — the Mostly Printed CNC Router, MPCNC — has now been built by tens of thousands of hobbyists worldwide.
The Primo is the current generation of that machine. It's not perfect. It's not the most rigid thing you can build. But it might be the best documented, most community-supported, and most cost-effective entry into serious hobby CNC routing that exists. Let's dig into what it actually is.
What Is the MPCNC Primo?
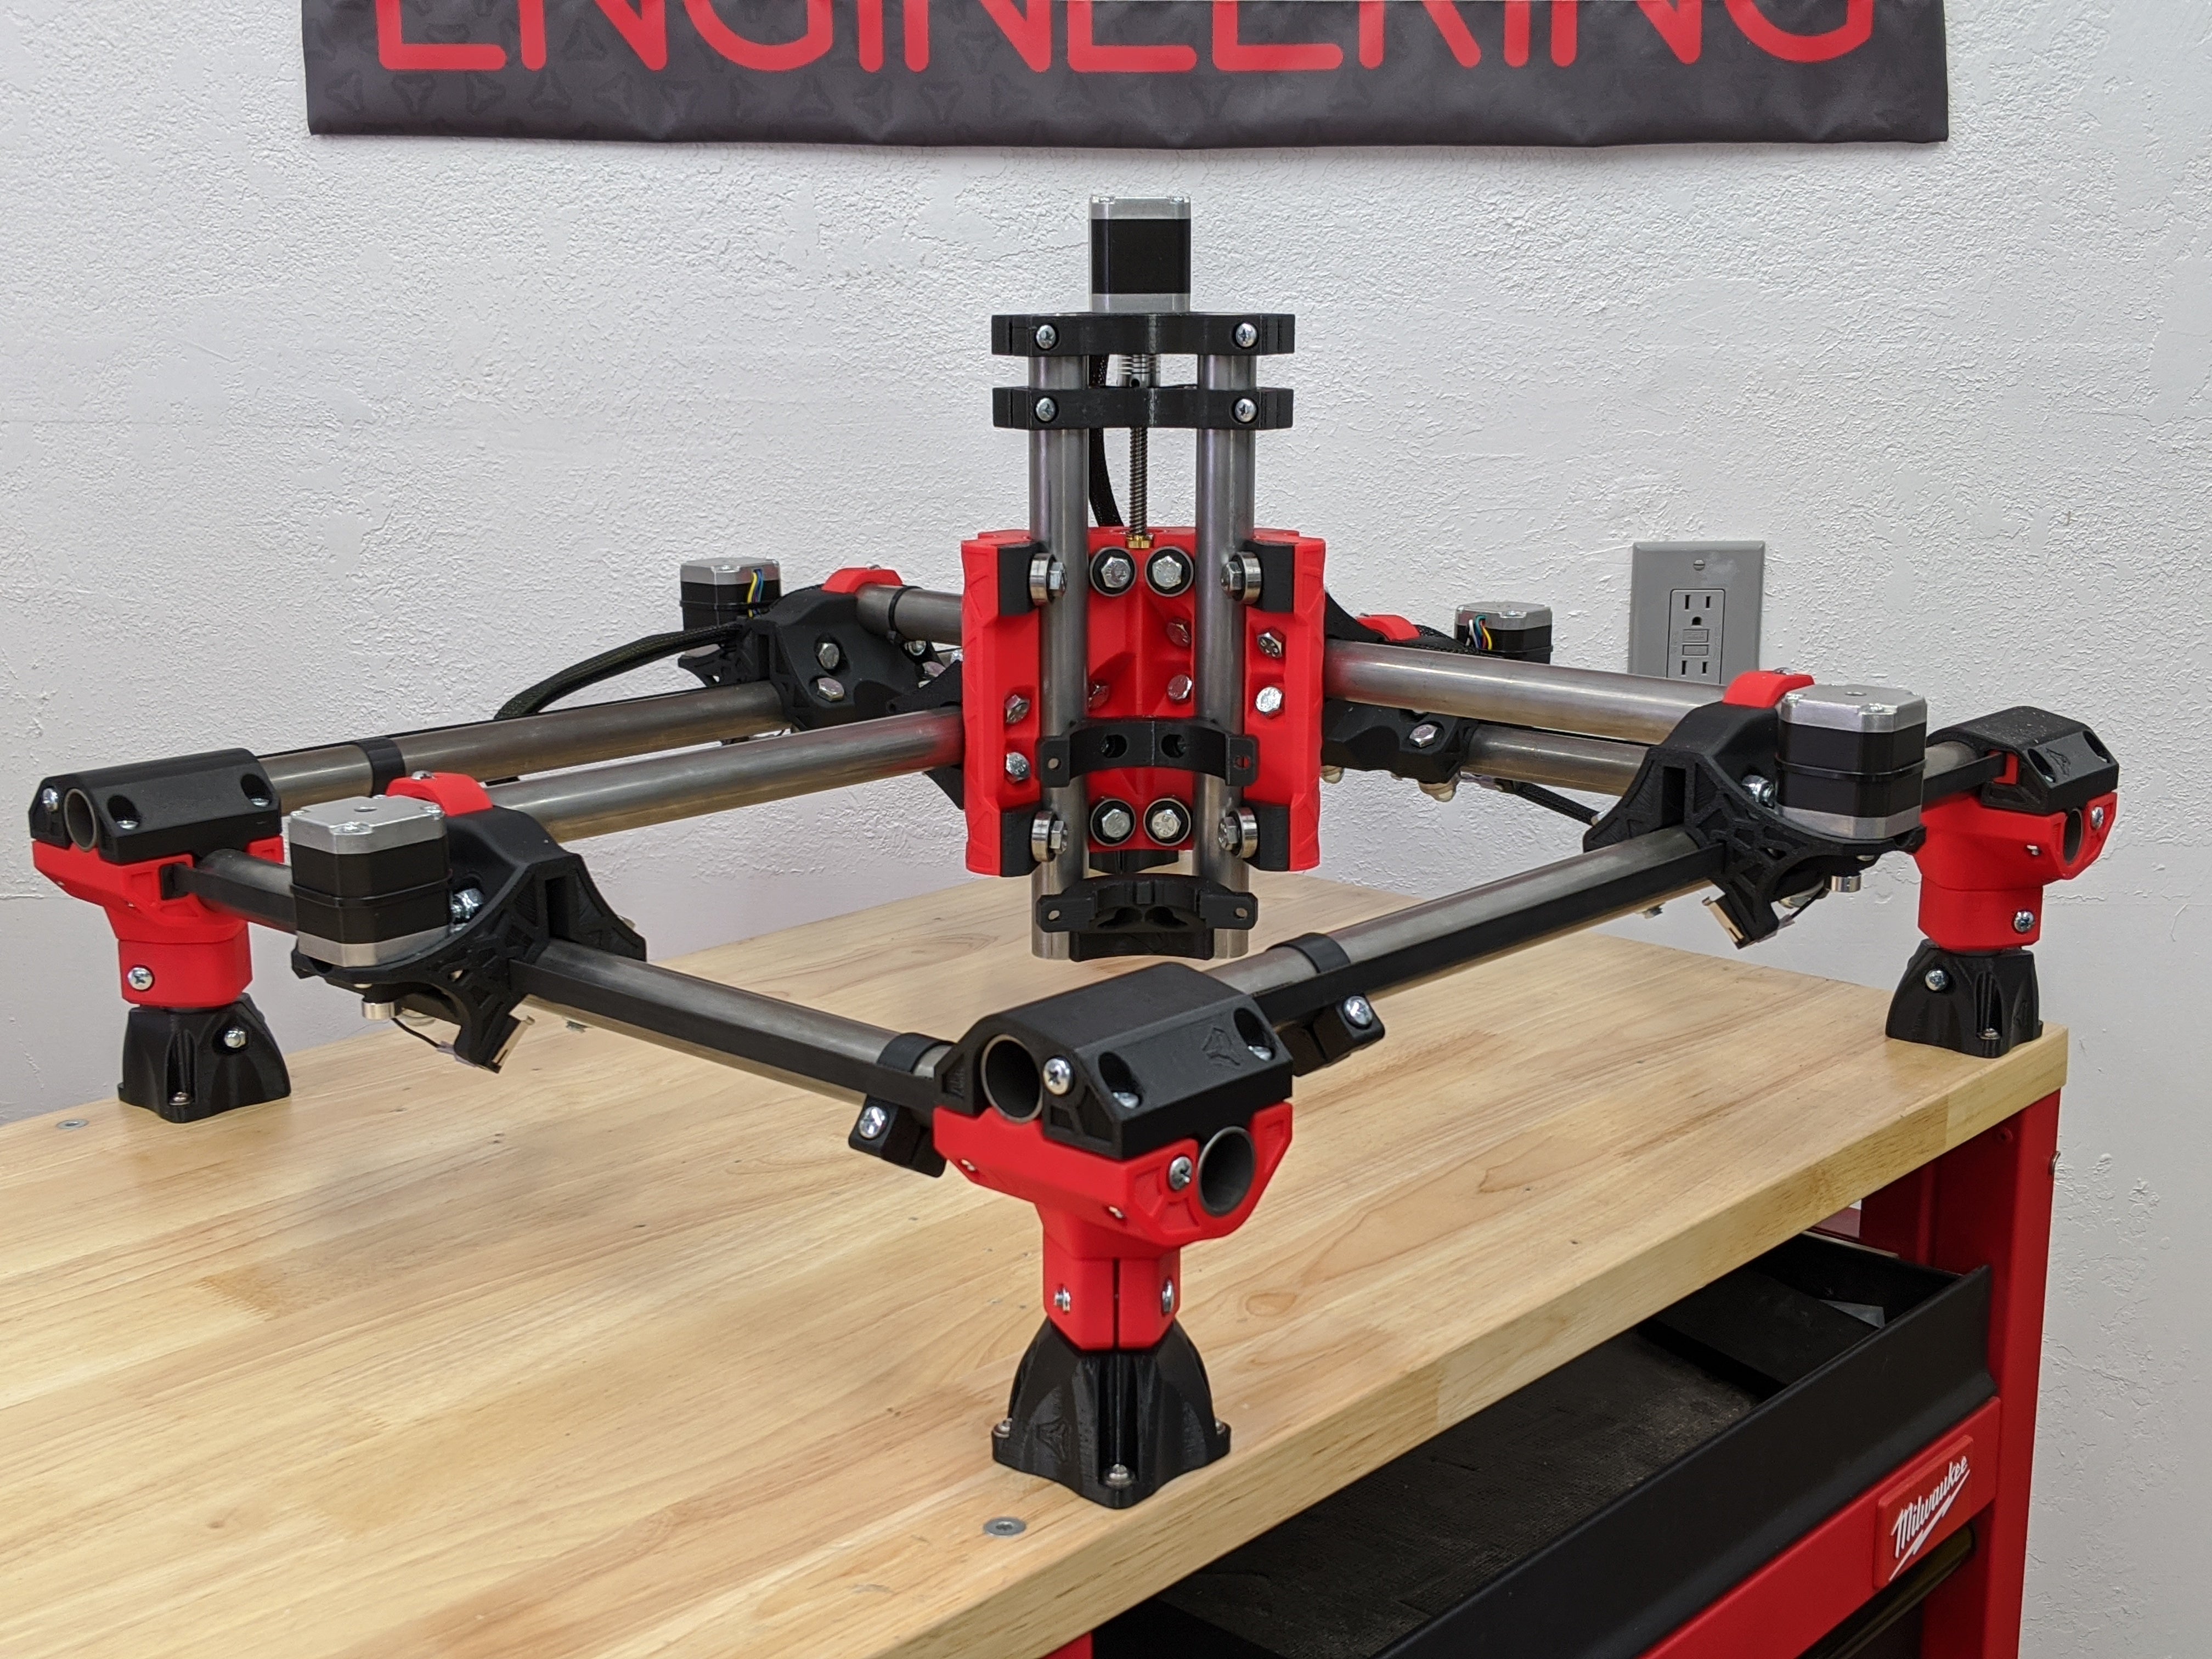
The MPCNC is a CNC router where most of the structural parts — corner pieces, center assembly, tool mount — are 3D printed, and the rails are standard electrical metallic tubing (EMT conduit) from any hardware store. The conduit is the key: it's straight, round, cheap, and available in every country. Instead of buying precision aluminum extrusion or linear rails, you're using $3 conduit that you cut yourself.
The printed parts connect to form a gantry that rides on the conduit rails. The result is a machine where you can theoretically build any XY work area you want — though rigidity starts limiting you around 600×600mm for anything harder than foam.
V1 Engineering (Ryan's company) sells the hardware kits, the electronics bundles, and the printed parts for those who don't own a 3D printer. The STL files are free on printables.com and always have been.
The Primo vs. Its Predecessors
The original MPCNC was called "Burly" and used a different printed part geometry and rail size. The Primo (current gen as of 2025) addressed several complaints:
- More rigid core assembly with better gantry stiffness
- Simplified rail geometry (fewer parts)
- Better tool mount compatibility
- Improved Z-axis design
- Cleaner cable routing
If you're looking at a build guide and see "Burly," it's an older design — check when it was published. Use the Primo files. The docs at docs.v1e.com are kept current and are genuinely one of the best-documented open-source projects around.
Key Specs and Build Options
Rail diameter: 25mm OD (0.984") — standard EMT conduit in the US. International builders need to verify their local conduit is close enough; V1 Engineering maintains a tube size chart.
Work area: Technically unlimited. Practically, keep X+Y combined under ~750mm total if cutting wood with a trim router. Each 50mm you add to a span reduces rigidity.
Z travel: Around 81mm with the standard build. Enough for most hobby work but tight if you're doing thick stock with a long bit.
Recommended spindle: The Makita RT0701C or DeWalt DWP611 are the community standards. They're both widely available, have good speed control, and mount cleanly to the MPCNC tool mount. A 500W DC spindle also works for lighter use.
Motors: NEMA17 on the standard build. Four motors total: two on Y (one each side), one on X, one on Z.
Controller: SKR Pro 1.2 is the current V1 recommendation with Marlin firmware (yes, Marlin — the 3D printer firmware, adapted for CNC). A Jackpot controller (ESP32-based, FluidNC) is also now officially supported and adds WiFi control.
What Does It Actually Cost?
This varies significantly by country and how much you source vs. buy from V1 Engineering, but a realistic US build in 2025:
| Component | Source | Estimated Cost |
|---|---|---|
| Printed parts | Print yourself (PETG, ~$15 filament) or buy from V1 | $15–60 |
| 25mm EMT conduit (cut to size) | Local hardware store | $25–40 |
| Hardware kit (bolts, bearings, tubes) | V1 Engineering shop | $55–75 |
| Motors + drivers (NEMA17 × 4 + drivers) | Amazon / V1 | $60–80 |
| Controller board (SKR Pro or Jackpot) | V1 Engineering | $50–90 |
| Power supply (24V, 15A) | Amazon | $25–35 |
| Makita RT0701C (router) | Amazon | $90–115 |
| Wiring, connectors, misc | Amazon / local | $20–30 |
| MDF spoilboard | Local | $10–20 |
| Total | ~$350–500 |
That's a working, capable wood and foam router. If you already own a 3D printer, knock ~$45 off the printed parts. If you source motors from AliExpress, subtract another ~$20. If you need V1 to print the parts for you, add ~$45.
What Can It Actually Cut?
Let's be direct about this.
Excellent at:
- MDF, plywood, soft woods (pine, poplar)
- Foam (EPS, XPS, HDU sign foam)
- HDPE, acrylic, thin PVC
- PCB milling (with care)
- 3D carving in wood with appropriate feeds and speeds
Possible with care and proper settings:
- Hardwoods (oak, maple, walnut) — light DOC, sharp bits, patience
- Thin aluminum (1–2mm sheet, lots of light passes)
- Carbon fiber (requires dust management, proper bits)
Not really designed for:
- Aluminum milling with any kind of depth
- High-precision parts under 0.1mm tolerance
- Production work requiring consistent repeatability session to session
The rigidity limitation is the conduit. For any serious aluminum work, look at PrintNC instead.
Strengths That Don't Show Up in Spec Sheets
The documentation is genuinely exceptional. V1 Engineering maintains thorough build guides, wiring diagrams, and CAM tutorials. For a first CNC build, this matters enormously — a machine with slightly worse specs but excellent docs will teach you more in the first three months than a better machine with no community.
The community is huge and helpful. The V1 Engineering forums have answered every question you're going to have, probably multiple times. Search before posting and you'll almost always find a thread.
It's infinitely repairable. Broke a printed part? Print another. Want to change the size? Recut conduit and reprint the relevant pieces. This is a machine you can maintain with $5 of filament and a weekend.
You can make it what you need. Dual endstops for auto-squaring, custom tool mounts, laser diode adapters, plasma cutter setups — the community has done all of it and documented it.
Weaknesses Worth Knowing About
Conduit rigidity has a ceiling. Once your machine is big enough that aluminum cutting becomes important, you'll hit a wall that no amount of tuning fixes. This isn't a bug — it's a design choice that prioritizes cost and accessibility over raw rigidity.
Z travel is limited. 81mm sounds fine until you're trying to cut a 60mm deep pocket with a bit that has a 25mm flute length. Plan your Z requirements before you build.
Setup and tramming takes time. The flexible nature of the build means you'll spend a few hours getting everything square and parallel before your first good cut. Follow the docs religiously — it's not complicated, just thorough.
Marlin for CNC is... fine. It works, the community uses it, but coming from a pure CNC background it feels like a 3D printer firmware wearing CNC clothes. The Jackpot/FluidNC option is cleaner from a CNC perspective.
Getting the Parts
Printed parts: Print yourself in PETG or ASA (not PLA — it's too brittle for the V-groove bearing surfaces). Alternatively, buy directly from V1 Engineering or find a local PrintShop or community member.
Hardware kit: V1 Engineering's kit includes all the non-printed structural hardware — bearings, stainless tubes, bolts, nut traps. Buying this directly from V1 is the simplest path.
Electronics: V1 sells a complete bundle with the SKR Pro, drivers, and LCD. You can source these separately for slightly less; the bundle is worth it for the first build.
Conduit: Buy locally (Home Depot, Lowes, local electrical supplier). Don't order it shipped — it's 10-foot lengths of metal tube and shipping costs are silly.
Trim router: The Makita RT0701C is the community standard for good reasons: variable speed, 1-1/4 HP, compact form factor, widely available, inexpensive to repair.
Shop: Makita RT0701C on Amazon →
Shop: V1 Engineering Hardware Kit (Official) → (non-affiliate — direct to community)
Who Should Build an MPCNC Primo?
Build one if:
- You want your first real CNC router and can already 3D print
- You're primarily cutting wood, foam, and plastics
- You value community support and documentation over maximum performance
- Budget is real — sub-$500 is difficult to beat for what you get
- You like building things and want to understand what you're running
Don't build one if:
- Your primary goal is cutting aluminum reliably (look at PrintNC instead)
- You have zero interest in the build and just want to cut things (look at kit machines)
- You need sub-0.05mm positional accuracy out of the box
- You want something portable or rigid enough to travel with
The MPCNC Primo is where a lot of serious CNC hobbyists started. It teaches you feeds and speeds, CAM, fixturing, and machine care in a context where mistakes are cheap. That's worth something that doesn't show up in any spec sheet.
Further Reading
Quick Reference
| Spec | Value |
|---|---|
| Rail diameter | 25mm OD EMT conduit |
| Max practical work area | ~600×600mm (wood) |
| Z travel | ~81mm |
| Recommended spindle | Makita RT0701C |
| Motors | NEMA17 (4 total) |
| Controller | SKR Pro 1.2 or Jackpot (FluidNC) |
| Firmware | Marlin or FluidNC |
| Typical build cost | $350–500 |
| Best for | Wood, foam, plastics, PCB milling |
| Community | forum.v1e.com |
All affiliate links on this page support the site at no extra cost to you. We link to official V1 Engineering resources without affiliate tracking because the project deserves it.