CNC Cable Management: Drag Chains and Why It Matters More Than You Think
Cable management is boring. You're excited to cut something, the machine is almost done, and managing cables feels optional. Then your drag chain gets pinched, a stepper wire ruptures, and you're troubleshooting intermittent axis faults at midnight.
Table of Contents
- The Last Step You'll Skip (Until Your Cable Gets Shredded)
- What Drag Chains Actually Do
- Sizing: The Part You'll Get Wrong
- Length: Don't Stint Here
- Self-Opening vs Solid Links
- Cable Types Matter
- What Cables Go in the Drag Chain
- Cable Protection Before the Drag Chain
- Mounting: Fixed vs Moving End
- Common Mistakes and How to Fix Them
- What We'd Buy
- Shop This Guide
- Related Reading
Slug: /guides/cnc-cable-management-drag-chain/
Read time: 7 minutes
The Last Step You'll Skip (Until Your Cable Gets Shredded)
Cable management is boring. You're excited to cut something, the machine is almost done, and managing cables feels optional. Then your drag chain gets pinched, a stepper wire ruptures, and you're troubleshooting intermittent axis faults at midnight.
Proper cable management isn't aesthetic—it's functional. Cables flex thousands of times during machine operation. Unsupported, they crack. Over-compressed, they short. Undersized drag chains let cables snag. Get it right, and your machine just works for years. Get it wrong, and you'll be replacing cables constantly.
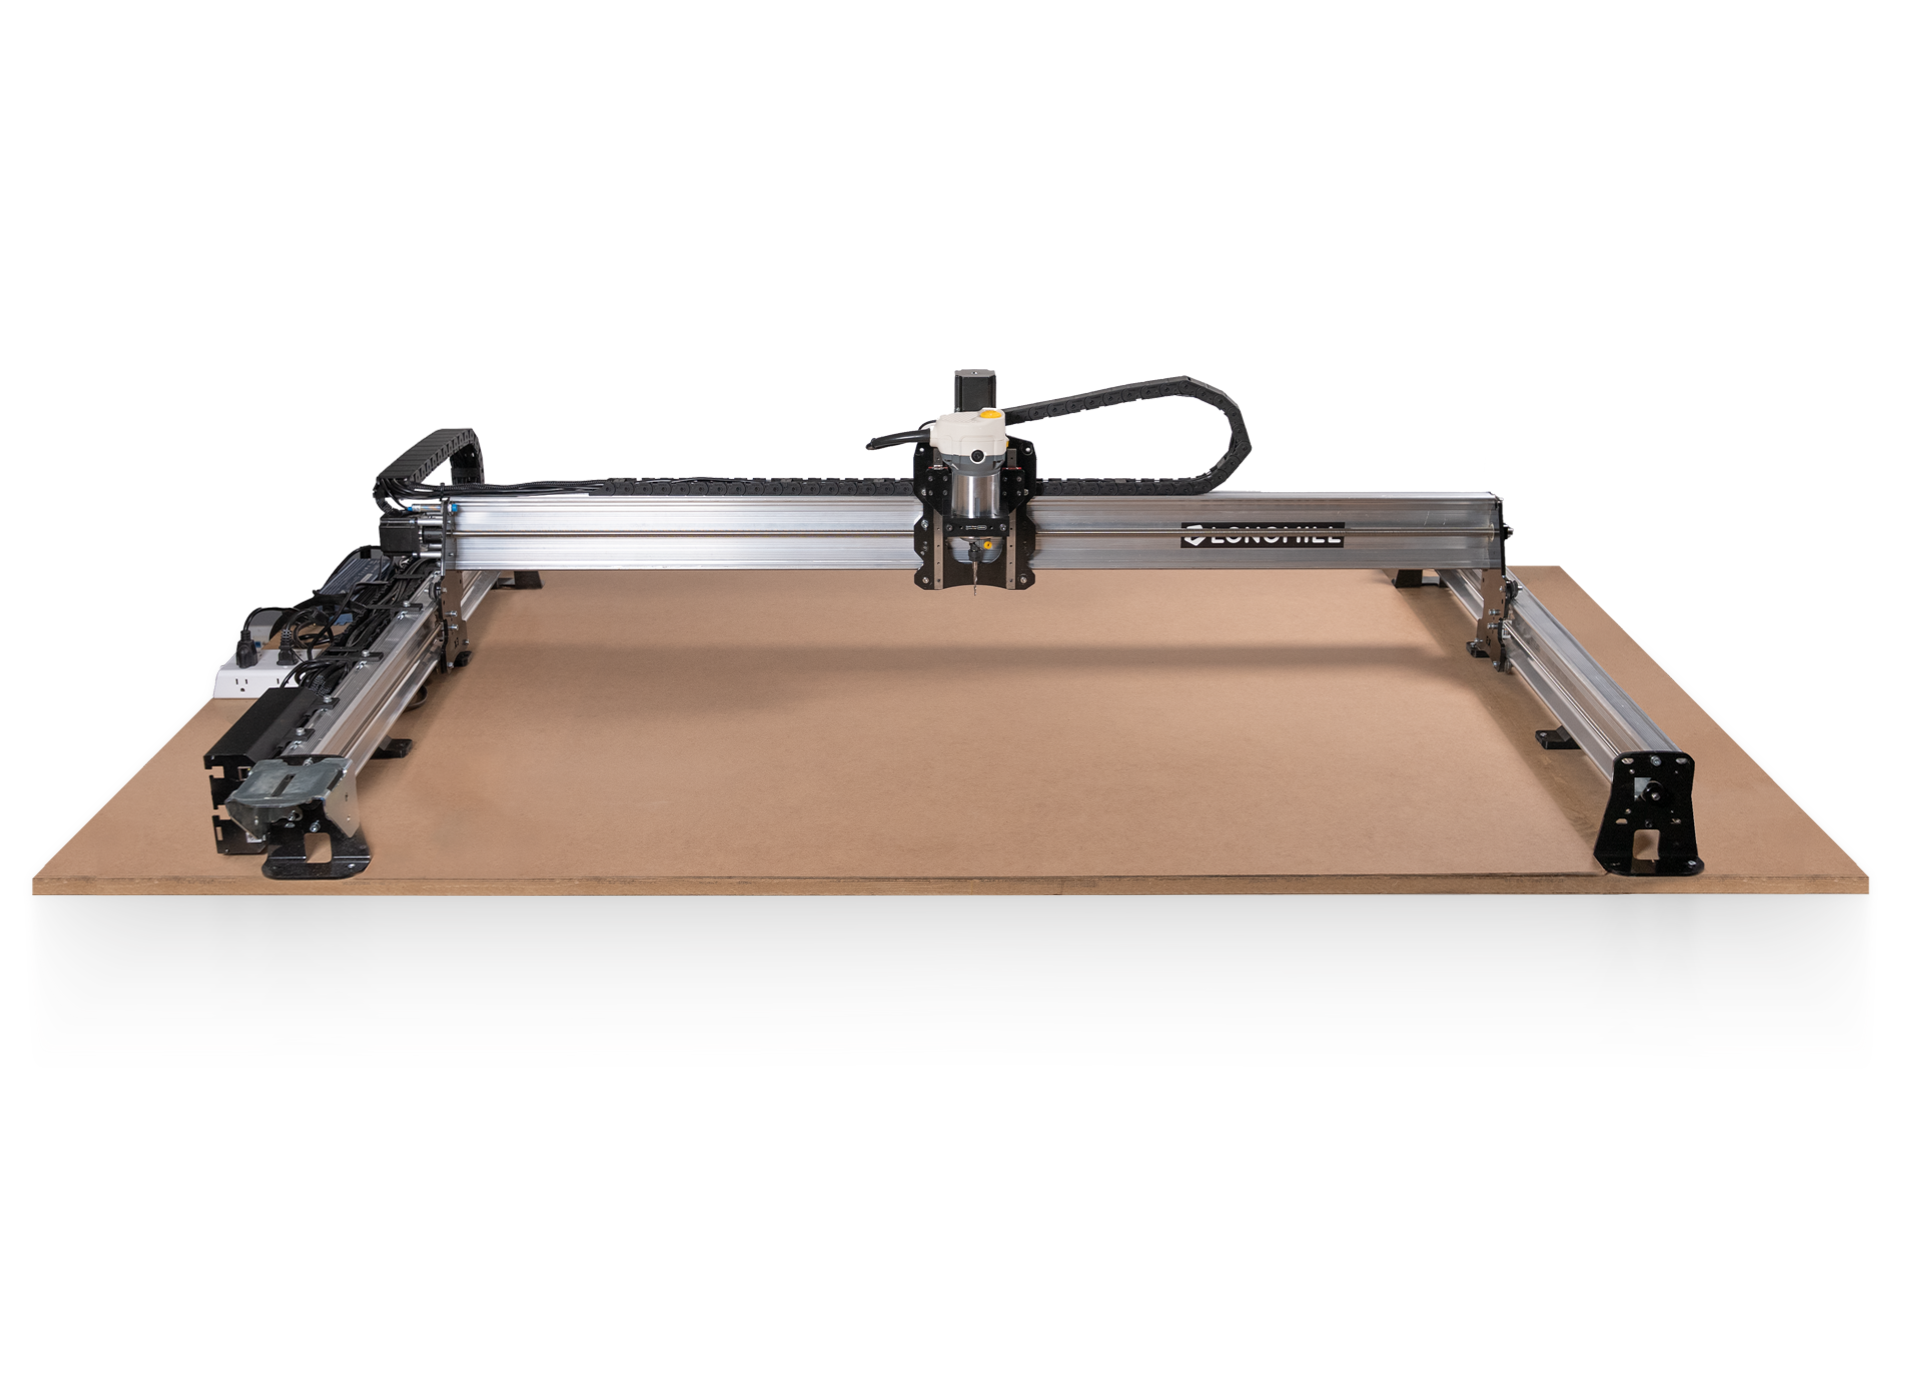
What Drag Chains Actually Do
A drag chain (also called energy chain or cable carrier) is a flexible plastic channel that flexes in one plane while protecting the cables inside. It's not a cable sleeve—it's a structural support that:
- Holds cables in organized bundles
- Prevents cables from catching on machine edges
- Allows smooth flexing without kinking
- Protects against sawdust, coolant, and debris
- Makes the machine look intentional instead of chaotic
Without a drag chain? Your cables are being flexed, pinched, and abraded on whatever edge they touch. After 10-20 hours of machine operation, insulation cracks. Cross-contact happens. You get ghost steps and mysterious faults.
Sizing: The Part You'll Get Wrong
Inner dimensions matter. If your drag chain is too small, cables compress, insulation damages, and you still have signal integrity issues.
Measurement approach:
- Bundle all cables you'll run through the chain
- Measure the bundle's width and height
- Pick a drag chain inner dimension at least 50% larger than the bundle
- Test-fit the bundle before committing
Common sizes in hobby CNC:
| Inner Dimension | Best For | Notes |
|---|---|---|
| 10×10mm | Very light: limit switches only | Too small for most CNC work. Avoid. |
| 10×15mm | Limit switches + probe | Fine for signal cables, NOT motor cables. |
| 15×20mm | Standard 3-axis + switches | Most common for hobby CNC. Motor cables + switches fit comfortably. |
| 18×25mm | VFD power cables | Larger gauge power wiring for VFD spindle. |
| 25×40mm | Heavy industrial | Overkill for hobby, but available if you need it. |
Default recommendation: If you're unsure, buy 15×20mm. It's the goldilocks size for almost all hobby CNC configurations.
Length: Don't Stint Here
Measure the full travel distance of your moving axis, then add 200-300mm of extra length for slack at the fixed end and connector routing.
If your Y-axis travels 800mm, your drag chain should be ~1100mm long. This prevents the chain from pulling under load and kinking cables.
Undersizing here is a common mistake. An extra 100mm of chain costs $2. Replacing a cracked motor cable in the middle of a job costs your time.
Self-Opening vs Solid Links
Self-opening links: The top hinges open, you lay cables inside, and it closes. Much easier to work with.
Solid links: You thread cables through from the end. Faster in theory, but if you misconfigure and need to change cables, you're pulling everything out and re-threading.
For hobby builds? Always buy self-opening. Cost difference is minimal, and you'll appreciate the flexibility when troubleshooting.
Cable Types Matter
Not all cables are equal for drag chain use:
Good: Stranded copper, flexible PVC insulation, rated for repeated flexing (typically 500k+ cycles). Most motor cables sold for CNC are fine here.
Bad: Solid copper wire (cracks under flex), thin insulation (fails quickly), cheap shielding that corrodes.
Check your cables before running them through the chain. Cheap NEMA stepper cables from AliExpress sometimes have questionable insulation. Upgrade to quality cables—they're $10-20 per set.
What Cables Go in the Drag Chain
Must have:
- Motor cables (X, Y, Z stepper leads)
- Limit switch signal cables
- Spindle control signal wires (0-10V to VFD)
- Tool sensor probes
Should separate (runs in different chains if possible):
- VFD power cables (220V/110V AC input)
- High-current power return paths
- Shielded cables near unshielded signal lines
Why the separation? High-power cables create electromagnetic interference. Keeping them away from signal cables reduces noise-induced step faults. It's the difference between an intermittent fault every 100 hours and rock-solid operation.
Realistically, in a small hobby setup, everything goes in one chain. But route signal cables away from power as much as possible inside the chain.
Cable Protection Before the Drag Chain
Before your cables enter the drag chain, they should be protected at the flex point where they attach to the moving carriage. Use braided cable sleeving (expandable nylon braid) for 100-150mm before the chain entrance.
This sleeving:
- Protects insulation from abrasion as cables flex into the chain
- Provides strain relief at the entry point
- Looks professional
Cost: ~$1-3 per set. Highly recommended.
Mounting: Fixed vs Moving End
One end of the drag chain attaches to the machine frame (fixed). One end attaches to the moving carriage (moving).
Fixed end: Bolt to the frame using the provided mounting bracket. Keep tension so the chain doesn't sag.
Moving end: Attach to the carriage or tool mount. The chain should follow the motion smoothly without being pulled.
Critical: Leave enough slack that the chain doesn't restrict motion. The chain flexes but shouldn't be under tension. Pinched chains crack.
Test fit: Move your carriage through full range. The chain should flex naturally without resistance. If you feel drag, you've over-tightened or undersized.
Common Mistakes and How to Fix Them
"I got a 10×10 drag chain to save money"
- Cables are compressed, insulation gets damaged
- Fix: Buy 15×20 and reroute. Cost is ~$15-25.
"Everything works fine without a drag chain"
- True... until it doesn't. Your first cable failure will be at 2am on a deadline.
- Drag chains cost $15-40. Install one now.
"I'm running motor power and signal cables in the same chain"
- Works until it doesn't. EMI causes intermittent step faults.
- Separate if possible, or at least keep them coiled opposite directions.
"I made the drag chain tight so it's stable"
- This pinches cables and creates kinks at the entry point.
- Slack is fine. The chain guides; it doesn't need to be rigid.
What We'd Buy
For a standard 3-axis CNC: 15×20mm self-opening drag chain kit with brackets and connectors. ~$20-40 for a 1-meter complete kit. Add braided sleeving (~$5) for the carriage flex points.
That's $30-50 total for cable management that lasts the life of the machine.
Shop This Guide
| Product | Link | Notes |
|---|---|---|
| 15×20mm Drag Chain Kit | 15x20mm Drag Chain Energy Chain CNC on Amazon → | Standard size. Self-opening recommended. Includes brackets. |
| 10×15mm Drag Chain | 10x15 Drag Chain Cable Carrier on Amazon → | For light signal-only configurations. Don't use for motor cables. |
| Complete CNC Drag Chain Set | CNC Drag Chain Bundle on AliExpress → | Bulk kits with brackets and fasteners. Cheaper per meter. |
| Braided Cable Sleeving | Expandable Braided Cable Sleeving on Amazon → | Protection at flex points. 1/4" - 3/8" diameter range for most CNC. |